Your Local Solar Team
Dive into our step-by-step guide to clearly understand the solar panel installation journey for a typical residential home.
We will look into selecting the right installer, the various stages of pre-installation assessments, and the ins and outs of permitting and approvals. Then, we will show you how the actual installation process works, post-installation items, and the overall benefits of making the shift to solar.
Whether you’re a new homeowner looking into solar for the first time or are ready to pull the trigger on solar a second or third time, this guide has you covered!
Your journey to harnessing solar energy begins with choosing the right solar installer, a decision that can significantly influence the success and cost of the installation.
It’s imperative to invest time in conducting comprehensive research, ensuring that you partner with a reputable solar company that aligns with your specific needs. In the competitive landscape of solar providers, it’s important to gather multiple quotes.
This not only provides a broader perspective on the available options but also ensures that you receive a fair and competitive offer. Companies like These professional engineers at our company are instrumental in guiding homeowners through the intricate decision-making process, ensuring every step is informed, transparent, and tailored to individual requirements. Their expertise ensures that homeowners are not just purchasing solar panels but are also embarking on a journey that is professionally advised and engineered, as well as strategically planned.
When thinking about using solar energy for your home, the first step is to check if your house is right for it. This check called a site evaluation, helps decide if the planned solar setup will work well.
During this check, experts determine the best location and orientation for the panels, usually favoring a south-facing direction in the Northern Hemisphere. They then look at the roof to see if it’s strong enough to hold the solar panels. They also peek into the attic to understand the roof’s inside structure, which is important for setting up the panels.
The home’s current electrical wiring is also checked to make sure it can work with the new solar system. Another important thing they look at is if anything, like tall trees or nearby buildings, might block sunlight from reaching the panels. And if you’re thinking about storing extra solar energy for later, they’ll also find a good spot in your home for a battery.
After the site evaluation, the next step is designing the solar system. This design is made based on what was found during the check and aims to get the most energy from the sun.
Embarking on your solar journey with Strive Solar is a decision paved with precision and assurance. The path to solar is intricate, yet, Strive Solar ensures a streamlined experience.
But it’s not just about how well it works. Homeowners often think about how the panels will look on their roofs and want a design that looks good with their house. The design also needs to fit in easily with the home’s electrical system.
The main goal is to make sure the solar setup can produce a lot of energy, considering where the house is and other things that might affect it. Sometimes, the first check might show some problems. When that happens, the design might be changed a bit to make sure the solar setup works well and meets what the homeowner wants.
Of course, before system design and engineering can take place, a solar company will want you to sign a contract to ensure that they are compensated for their time and effort to provide this work.
In this phase, we will be reviewing, signing, and validating items, which are accessible via the Strive Solar installation contractor platforms (such as website and mobile apps)
Should system redesigns surface post-contract or prerequisites like re-roofing arise, or even considerations about decommissioning or system removal in the distant future, Strive Solar is on standby. Our continuous support, troubleshooting prowess, and educational outreach are part and parcel of our commitment.
After the design engineering and contracts are done, the next step is the physical installation of the solar panels and solar system peripherals.
The process of physically installing solar panels is detailed below. This physical installation, encompassing both mechanical and electrical facets, typically takes a short duration.
The actual time it takes to install solar panels is a few days. Homeowners don’t necessarily need to be present, but they should be aware that their power might be turned off for a short period.
Professionals conduct a site evaluation to verify the planned system design. They check various aspects, including the roof and electrical setup. Once the original design undergoes any necessary changes, homeowners review and approve the final design. The approved design is then sent to the city for safety permit approval. After the installation, a city inspector ensures the work aligns with safety standards. The last step involves the utility company, which approves the system’s connection to the grid.
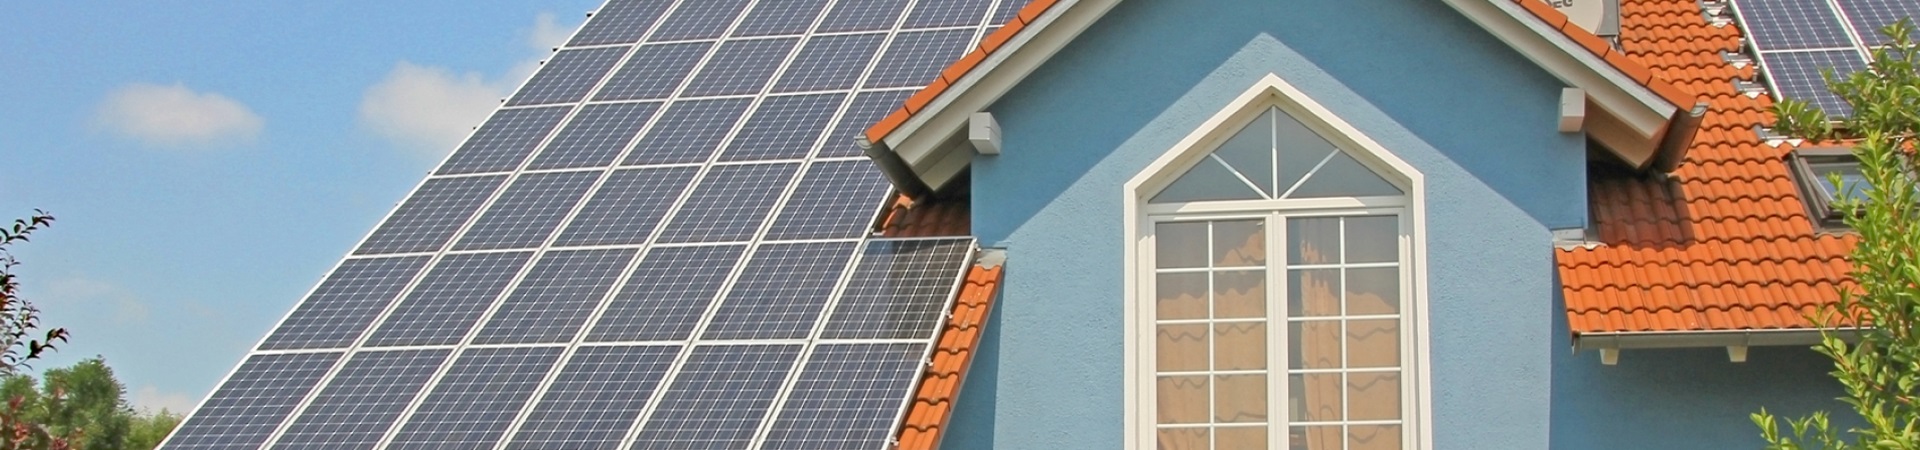
The mechanical process begins with the secure attachment of durable mounting brackets to the roof. These brackets support the racking system where solar panels will be mounted. The panels are then aligned at the correct angle and secured using bolts to ensure maximum sunlight capture.
The electrical components are integral to the functioning of the solar system. An inverter is installed to convert the direct current (DC) produced by the solar panels into alternating current (AC) for home use. Proper wiring and connectors integrate the solar system with the home’s electrical grid. Safety measures, such as circuit breakers, are put in place to ensure safe and efficient energy transmission.
Professional installation of solar panels is crucial for both safety and efficiency. These significant investments function optimally when installed correctly. Trained professionals adhere to safety standards, ensuring the panels are securely in place and capture maximum sunlight.
Purpose and Importance: The Final City Inspection is crucial for ensuring the solar installation aligns with the permitted scope of work. This step is essential because it guarantees that the installation adheres to local safety and structural standards.
Duration of Work: The time it takes for this inspection varies based on location. Some cities might have a quicker turnaround, while others might take longer due to higher demand or bureaucratic processes.
Why is this step needed?: After the city inspection, homeowners need to gain approval from the utility company to connect their solar system to the grid. This is vital because it ensures the solar system’s compatibility with the local electrical grid and confirms that it won’t cause any disruptions or safety concerns.
The Final Step–Once the city inspection is cleared and the utility company grants Permission to Operate (PTO), the final step is to activate the solar system. This is the moment homeowners often eagerly await — when they can finally harness the power of the sun for their daily energy needs.
Safety First: Before activation, it’s essential to ensure all connections are secure and the system is safe to operate. The solar installation company typically provides guidelines or a walkthrough for homeowners, ensuring they understand the activation process and any maintenance or monitoring tasks.
Monitoring Systems: Many modern solar installations come with monitoring systems. These systems allow homeowners to track their solar energy production in real time, monitor the health of their solar panels, and even estimate monthly savings. Once the system is activated, homeowners should ensure their monitoring system is online and functioning correctly.
Immediate Benefits: As soon as the solar system is activated, homeowners can start benefiting from reduced electricity bills. The solar panels will begin converting sunlight into electricity, powering the home during the day, and in some cases, sending excess energy back to the grid for credits.
Embarking on a solar panel installation process can be an intricate yet rewarding endeavor. Homeowners keen on adopting a solar energy system should prioritize choosing a reputable solar company.
Renewable energy, in the form of solar power, offers homeowners a chance to contribute to the environment while curbing high energy bills. Once a suitable site is chosen, solar panel installations require the creation of a tailored design to ensure maximum efficiency. Crucial components of the solar power system, such as the solar inverter, play pivotal roles in converting sunlight into usable electrical power for electrical appliances.
Considering the energy usage of the home, factors like how many solar panels are needed, the inclusion of a solar battery or battery bank, and potential solar photovoltaic panels are essential. While DIY solar panel installation might seem enticing, professional installation ensures the safe mounting of solar panel mounts, precise connections to the electric grid, and optimal placement for direct sunlight exposure. Systems often come with a solar inverter and sometimes even solar trackers to improve energy capture. Battery systems can be included for energy storage.
With the continuous rise in solar electricity popularity, homeowners can save money, reduce dependence on fossil fuels, and enjoy free renewable green energy. Deciding to purchase solar panels is not just about cutting costs but also about making a long-term investment in a cleaner future. With the installation costs balanced out by future savings and potential solar loans, the journey to solar power becomes accessible to many.
Want to know more about our company or want to chat about specifics about the steps involved in getting a solar system?
Get a FREE and Friendly Consultation.


“We recently had a solar energy system installation at our home, and we are beyond thrilled with the results! From the initial consultation to the final installation, the entire process was seamless. Our electricity bills have significantly decreased, and we feel great about reducing our carbon footprint. Thank you, Strive Solar”
“I have to commend Strive Solar’s commitment to affordable pricing for solar energy systems. It’s refreshing to find a provider that truly understands the importance of making renewable energy accessible to everyone. We were able to install a top-notch solar energy system without breaking the bank. The system has performed exceptionally well, and we couldn’t be happier with the cost savings and environmental benefits it brings.”
“We recently had the pleasure of working with your team for the installation of our solar energy system. Right from the start, your staff was professional, courteous, and attentive to our needs. The installation itself was flawless, and our energy savings are already noticeable. It’s a pleasure to recommend your services to others.”
“The solar energy consultation we received from your company far exceeded our expectations. The consultant’s expertise and genuine passion for renewable energy were apparent throughout the whole process. They patiently addressed all our concerns and designed a system that perfectly suits our energy needs. We are thrilled to be making a positive impact on the environment and cutting our energy costs.”
“Thanks to your company’s affordable pricing, we were able to make the switch to solar energy without breaking our budget. The investment has been worth it in every way. Our energy bills have significantly decreased, and it’s empowering to know that we are contributing to a greener future. Your team’s professionalism and attention to detail were commendable throughout the entire installation process.”
“I am extremely impressed with the solar energy system installation conducted by your team. They were prompt, efficient, and paid great attention to detail. The system is working flawlessly, and we’re seeing significant savings on our electricity bills. Thank you for the excellent service and for helping us embrace a more sustainable lifestyle.”
“The solar energy consultation we received was an enlightening experience. The consultant patiently explained how solar power works and its long-term benefits. They also assessed our energy consumption to design a system that perfectly suits our needs. We are now proud solar energy users, enjoying reduced bills and the satisfaction of going green.”
“Your company’s affordable pricing for solar energy systems allowed us to make a positive change for both our budget and the environment. The installation process was swift and professional, and the system exceeded our expectations. We are delighted with the financial and environmental rewards we’re reaping already!”
“The solar energy consultation was not only informative but also tailored to our specific requirements. The consultant guided us through every step, helping us understand the benefits of solar power and the potential savings. Thanks to their expertise, we made an informed decision and couldn’t be happier with our solar energy system. It’s a smart investment that will pay off in the long run.”
“The solar energy consultation provided by your company was invaluable. The consultant carefully explained the process, answered all our questions, and helped us choose the best system for our needs. Thanks to their guidance, we now have a reliable, cost-saving solar energy solution that aligns perfectly with our sustainability goals.”
“The pricing of your solar energy system was unbelievably affordable. We had been considering going solar for a while, but your competitive prices made it a reality for us. The quality of the system surpassed our expectations, and we’re amazed at how quickly we’re recouping our investment. It’s truly a wise financial decision, and we highly recommend your services.”
“I can’t recommend the solar energy consultation provided by your Strive Solar enough. The consultant was incredibly knowledgeable and helped us understand all the benefits of switching to solar power. Now, we are enjoying the benefits of clean energy while saving on our monthly utility bills. Thank you for your excellent service!”
“The affordable pricing of the solar energy system offered by your company was what initially caught my attention. But after the installation, I couldn’t be happier with my decision. The panels are not only aesthetically pleasing, but they also generate a substantial amount of energy for our household. I’m thrilled with the cost-savings and environmental benefits.”
“From start to finish, our solar energy system installation was handled professionally and efficiently. The crew from Strive Solar was punctual, courteous, and left no mess behind. The panels are seamlessly integrated into our roof, enhancing the overall appearance of our home. We are extremely satisfied customers!”
“I am so impressed with the solar energy consultation I received from Strive Solar. The consultant took the time to thoroughly assess our energy needs and provided us with a tailored solution. Their patience and expertise were remarkable. We are delighted with our new solar energy system and the savings it has brought to our monthly bills.”
“Your solar energy system installation team was incredible. They worked diligently and completed the installation in no time. The panels are perfectly placed to maximize sunlight exposure, and the system’s performance has exceeded our expectations. We are thrilled to be using clean, renewable energy and will recommend your services to everyone we know!”
“I was initially worried about the cost of installing a solar energy system, but Strive Solar’s affordable pricing made it a no-brainer. Not only did we recoup our investment quickly through reduced electricity bills, but we are also making a positive impact on the environment. It’s a win-win situation, and I couldn’t be happier with our decision!”
“The solar energy consultation we received was an eye-opener. John educated us on the advantages of solar power and helped us understand the long-term savings involved. Stive Solar’s professional and friendly approach made the entire process stress-free. We are now proud owners of a solar energy system and couldn’t be happier with the advice and support we received.”
“The installation of our solar energy system was an absolute breeze! The team was knowledgeable, efficient, and respectful of our property. The panels are working flawlessly, and our energy bills have drastically decreased. It’s incredible to see the positive impact we are making on the environment. Thank you for an exceptional experience!”
“Your company’s commitment to affordable pricing for solar energy systems is truly commendable. We were thrilled to find a provider that not only offered high-quality products but also made solar power accessible to everyone. The installation process was professional and seamless, and we’re already reaping the benefits of reduced energy bills. Thank you for making sustainability affordable for all.”