Your Local Solar Team
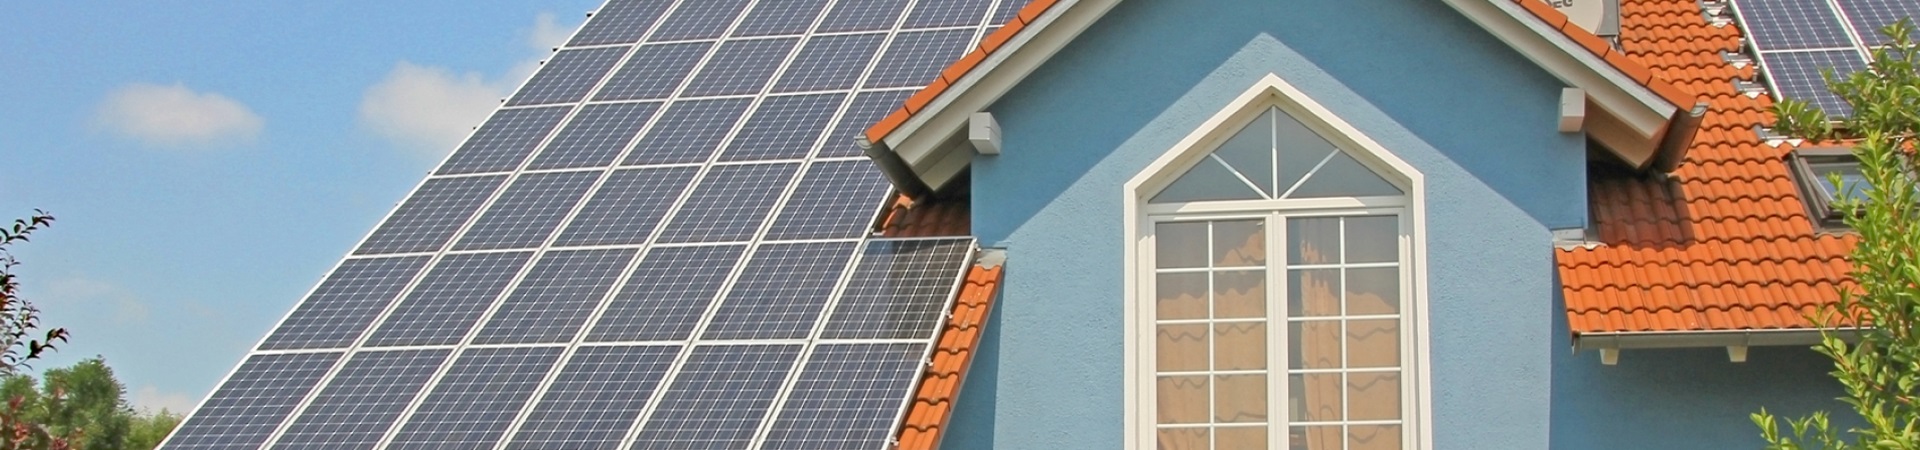
Taking the leap toward harnessing renewable energy can feel overwhelming; there’s a lot to consider and plan out, especially when it comes to residential solar panel installation. That’s why we’ve stripped down the process to its bare essentials, providing you with a definitive step-by-step checklist for your project.
From initial site evaluation to flipping the switch on your new system, this guide will traverse every hurdle and highlight each milestone to ensure smooth sailing on the path to cleaner energy.
Let’s turn that daunting feeling into a sense of empowerment as we ambitiously venture into the world of sustainable living. So, soak up some knowledge (just like your new panels will do with the sun) and prepare to embark on your solar journey confidently.
Our Solar Installation Checklist provides a detailed list of considerations for homeowners interested in solar panel installation, such as calculating energy needs, selecting equipment, researching incentives and financing options, obtaining permits and approvals from local authorities, and hiring skilled contractors. These steps will help ensure that you have a smooth installation process and enjoy the full benefits of clean, renewable energy for years to come.
Before embarking on a solar installation project, careful planning and thorough research play a pivotal role in ensuring the success and safety of the endeavor. This stage not only allows you to gather all the necessary information but also enables you to make well-informed decisions that can maximize the efficiency of your solar system while adhering to safety guidelines.
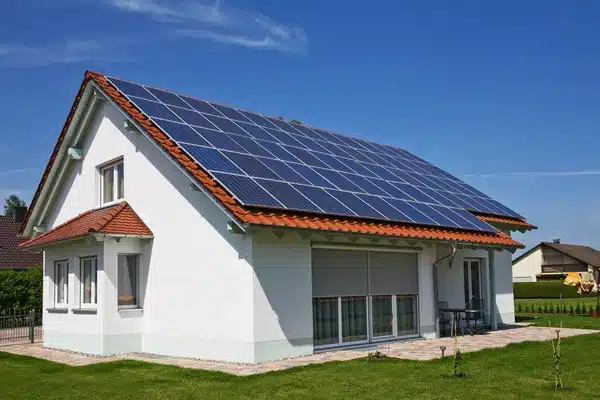
First and foremost, it’s crucial to evaluate your rooftop suitability for solar panels. Confirm that your roof is structurally sound and capable of accommodating the weight of the solar modules. Additionally, assess its orientation and shading factors. A south-facing roof with minimal obstruction from trees or neighboring buildings will receive optimal sunlight exposure throughout the day. Remember, maximizing sunlight absorption is key to generating more electricity.
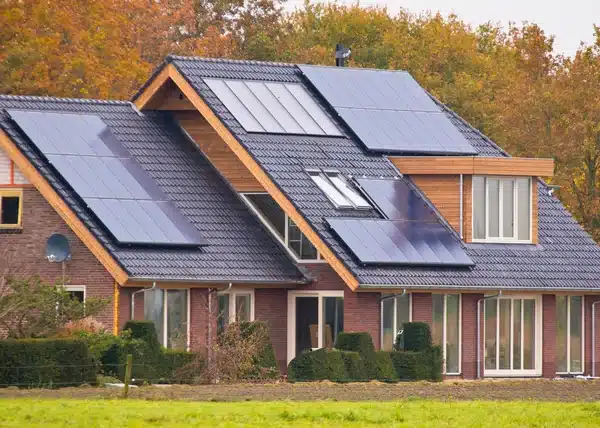
The next step involves conducting a shade analysis. By using advanced tools or consulting with professionals, determine potential sources of shading during different times of day and seasons, as shadows can significantly impact your system’s overall performance. Pruning trees or considering alternate panel placements to minimize shading can ultimately result in higher energy production.
In order to streamline your project, take some time to perform an electrical audit of your property. Analyze your current energy consumption patterns and identify areas where energy efficiency improvements can be made. This will not only help you estimate the size of the solar system required but also allow you to make informed choices regarding energy usage optimization.
For instance, consider replacing old appliances with energy-efficient ones or improving insulation to reduce heating or cooling needs. These steps can help lower overall energy demand, potentially resulting in a smaller solar system size and greater financial savings.
Apart from these considerations, thoroughly review state and local regulations regarding solar installations. Ensure compliance with permitting requirements, zoning restrictions, utility interconnection policies, and any additional rules that may affect your project. Engaging with local authorities or hiring professional solar installers who are familiar with regional regulations can be immensely helpful in navigating this aspect.
With proper planning and safety research completed, the next critical step in maximizing the effectiveness of your solar system is ensuring proper orientation to capture as much sunlight as possible.
The orientation of your solar panels has a significant impact on their overall performance. Properly aligning them with the sun’s path ensures maximum exposure and subsequent electricity generation. Generally, south-facing panels provide optimal solar energy absorption throughout the day.
However, it’s important to note that the specific tilt angle also plays a role in optimizing energy production. The angle should correspond to the latitude of your location for maximum efficiency. For example, in areas closer to the equator with higher average sun elevations, a lower tilt angle might be more suitable, while at higher latitudes, a steeper tilt angle may be required.
Consider an installation in Miami, Florida (latitude approximately 25.8 degrees). In this case, setting the tilt angle of solar panels around 25-30 degrees would align them almost perfectly with the sun’s path and allow for optimal energy capture throughout the year.
However, it’s essential to evaluate shading factors when determining panel tilt angles. As mentioned earlier, nearby objects like trees or buildings can cast shadows that reduce energy generation. Analyzing shading patterns throughout the year can help identify areas where adjustments are necessary to maximize system output.
It’s worth mentioning that technological advancements like solar tracking systems have emerged to further optimize energy collection by adjusting panel orientations dynamically based on the movement of the sun. While these systems can be beneficial in certain scenarios, they are often more common in large-scale commercial installations rather than residential projects.
By planning meticulously and conducting thorough safety research before proceeding with your solar installation, you lay a solid foundation for success. Furthermore, ensuring proper orientation enables you to harness maximum solar energy, ultimately resulting in enhanced system output and increased energy savings.
Before diving into the exciting world of solar installation, it’s crucial to address the electrical and safety precautions that should be considered for a successful and risk-free project. Working with electricity always demands respect and caution, and solar installations are no exception.
An important initial step is to hire a Professional Engineer or Registered Architect to assess your building’s structural system. Solar panels can generate electricity and capture/store thermal energy, which places additional stress on the structure. Ensuring that your building can safely support the weight of the equipment is essential to avoid any potential hazards.
Furthermore, obtaining the necessary permits for your solar energy system is critical. Different filing processes are available, including submitting your application as part of another permit or separately through borough offices or The HUB. The Department of Buildings typically reviews complete applications within 5-10 days, but larger or more complex projects may require additional review time.
One key aspect to keep in mind during the installation process is inspections. Inspections are required for all solar installations that have permits. These inspections help ensure that the installation meets safety standards and complies with local codes. It’s important not to overlook these inspections, as skipping them may result in non-compliance and potential legal issues down the line.
Picture this: You’ve completed your solar installation without inspection and compliance. Months later, an electrical issue arose due to faulty wiring that was undetected during installation because there were no inspections conducted. This not only puts your property at risk but also jeopardizes the safety of those who inhabit it. Avoiding this scenario is as simple as following proper inspection protocols.
Now that we’ve covered electrical and safety precautions, let’s move on to the next important step in our solar installation checklist: Inspection, Permitting, and Compliance with Local Codes.
Navigating the process of inspection, permitting, and compliance with local codes may seem like a bureaucratic hurdle, but it is an essential part of ensuring the proper functioning and safety of your solar installation. Following the proper procedures will save you time, money, and potential legal consequences.
The first step in this process is to file the necessary permits for your solar energy project. This can be done by submitting a Plan/Work Approval Application (PW1) through The HUB or via other filing options available. Make sure to provide all required documents and information, such as structural plans, electrical diagrams, and information about the solar panels and system you plan to install.
Once your application is submitted, it will go through a review process by the Department of Buildings. The timeline for review varies depending on the complexity of the project but typically ranges from 5-10 days for complete applications. For larger or more complex projects, additional review time may be required.
During this review process, you have different filing options available. You can choose between full plan review by the Department of Buildings or professional certification/self-certification if you’re working with a Registered Design Professional. Additionally, same-day review appointments can be scheduled online through The HUB for certain smaller projects.
It’s important to note that compliance with local codes is crucial throughout the entire installation process.
Familiarize yourself with the NYC Solar Electric-generating Systems’ Rule and ensure that your installation adheres to its requirements. Failure to comply with these regulations may result in delays or even the need to redo parts of your installation.
Think of this step as laying a strong foundation for a building. Compliance with local codes ensures that your solar installation is structurally sound and meets all necessary requirements. Without a solid foundation, your entire project could be compromised.
With inspection, permitting, and compliance with local codes covered, we’ve now laid solid groundwork for our solar installation journey.
When it comes to setting up a solar system for your residential project, there are several essential materials you’ll need to ensure a successful installation. These materials include solar panels, inverters, mounting racks, and optional batteries.
As you embark on your solar installation project, it’s essential to work with a professional installer who can guide you in selecting high-quality materials that meet industry standards. They will ensure that you have the right combination of components for optimal performance and durability. Now that we understand the essential materials let’s explore the two options for installation: professional versus DIY.
When it comes to installing a solar system, you may find yourself debating between engaging professional installers or taking a DIY approach. Both options have their merits, and deciding which route to take depends on various factors.
Professional Installation: Opting for professional installation ensures expertise and experience in solar system setup. Professional installers are trained and certified to handle all aspects of the installation process, including site assessment, system design, obtaining necessary permits, equipment procurement, and proper installation. They will ensure your solar system functions optimally and complies with building codes and regulations. Additionally, professional installers often provide warranties on their workmanship, giving you peace of mind.
DIY Approach: On the other hand, some individuals prefer a hands-on approach and enjoy the challenge of installing their own solar system. Going the DIY route requires significant knowledge of electrical systems, construction practices, and familiarity with local regulations. You’ll need to source all the necessary components yourself and invest time in researching and planning your system design. While this option can save money on labor costs, it’s important to note that without professional expertise, mistakes in system design or installation could lead to inefficiencies or even safety hazards.
Ultimately, choosing between a professional installation like Now that we’ve explored the pros and cons of each approach to solar installation, you can make an informed decision based on your unique circumstances and preferences. Contact us today!


“We recently had a solar energy system installation at our home, and we are beyond thrilled with the results! From the initial consultation to the final installation, the entire process was seamless. Our electricity bills have significantly decreased, and we feel great about reducing our carbon footprint. Thank you, Strive Solar”
“I have to commend Strive Solar’s commitment to affordable pricing for solar energy systems. It’s refreshing to find a provider that truly understands the importance of making renewable energy accessible to everyone. We were able to install a top-notch solar energy system without breaking the bank. The system has performed exceptionally well, and we couldn’t be happier with the cost savings and environmental benefits it brings.”
“We recently had the pleasure of working with your team for the installation of our solar energy system. Right from the start, your staff was professional, courteous, and attentive to our needs. The installation itself was flawless, and our energy savings are already noticeable. It’s a pleasure to recommend your services to others.”
“The solar energy consultation we received from your company far exceeded our expectations. The consultant’s expertise and genuine passion for renewable energy were apparent throughout the whole process. They patiently addressed all our concerns and designed a system that perfectly suits our energy needs. We are thrilled to be making a positive impact on the environment and cutting our energy costs.”
“Thanks to your company’s affordable pricing, we were able to make the switch to solar energy without breaking our budget. The investment has been worth it in every way. Our energy bills have significantly decreased, and it’s empowering to know that we are contributing to a greener future. Your team’s professionalism and attention to detail were commendable throughout the entire installation process.”
“I am extremely impressed with the solar energy system installation conducted by your team. They were prompt, efficient, and paid great attention to detail. The system is working flawlessly, and we’re seeing significant savings on our electricity bills. Thank you for the excellent service and for helping us embrace a more sustainable lifestyle.”
“The solar energy consultation we received was an enlightening experience. The consultant patiently explained how solar power works and its long-term benefits. They also assessed our energy consumption to design a system that perfectly suits our needs. We are now proud solar energy users, enjoying reduced bills and the satisfaction of going green.”
“Your company’s affordable pricing for solar energy systems allowed us to make a positive change for both our budget and the environment. The installation process was swift and professional, and the system exceeded our expectations. We are delighted with the financial and environmental rewards we’re reaping already!”
“The solar energy consultation was not only informative but also tailored to our specific requirements. The consultant guided us through every step, helping us understand the benefits of solar power and the potential savings. Thanks to their expertise, we made an informed decision and couldn’t be happier with our solar energy system. It’s a smart investment that will pay off in the long run.”
“The solar energy consultation provided by your company was invaluable. The consultant carefully explained the process, answered all our questions, and helped us choose the best system for our needs. Thanks to their guidance, we now have a reliable, cost-saving solar energy solution that aligns perfectly with our sustainability goals.”
“The pricing of your solar energy system was unbelievably affordable. We had been considering going solar for a while, but your competitive prices made it a reality for us. The quality of the system surpassed our expectations, and we’re amazed at how quickly we’re recouping our investment. It’s truly a wise financial decision, and we highly recommend your services.”
“I can’t recommend the solar energy consultation provided by your Strive Solar enough. The consultant was incredibly knowledgeable and helped us understand all the benefits of switching to solar power. Now, we are enjoying the benefits of clean energy while saving on our monthly utility bills. Thank you for your excellent service!”
“The affordable pricing of the solar energy system offered by your company was what initially caught my attention. But after the installation, I couldn’t be happier with my decision. The panels are not only aesthetically pleasing, but they also generate a substantial amount of energy for our household. I’m thrilled with the cost-savings and environmental benefits.”
“From start to finish, our solar energy system installation was handled professionally and efficiently. The crew from Strive Solar was punctual, courteous, and left no mess behind. The panels are seamlessly integrated into our roof, enhancing the overall appearance of our home. We are extremely satisfied customers!”
“I am so impressed with the solar energy consultation I received from Strive Solar. The consultant took the time to thoroughly assess our energy needs and provided us with a tailored solution. Their patience and expertise were remarkable. We are delighted with our new solar energy system and the savings it has brought to our monthly bills.”
“Your solar energy system installation team was incredible. They worked diligently and completed the installation in no time. The panels are perfectly placed to maximize sunlight exposure, and the system’s performance has exceeded our expectations. We are thrilled to be using clean, renewable energy and will recommend your services to everyone we know!”
“I was initially worried about the cost of installing a solar energy system, but Strive Solar’s affordable pricing made it a no-brainer. Not only did we recoup our investment quickly through reduced electricity bills, but we are also making a positive impact on the environment. It’s a win-win situation, and I couldn’t be happier with our decision!”
“The solar energy consultation we received was an eye-opener. John educated us on the advantages of solar power and helped us understand the long-term savings involved. Stive Solar’s professional and friendly approach made the entire process stress-free. We are now proud owners of a solar energy system and couldn’t be happier with the advice and support we received.”
“The installation of our solar energy system was an absolute breeze! The team was knowledgeable, efficient, and respectful of our property. The panels are working flawlessly, and our energy bills have drastically decreased. It’s incredible to see the positive impact we are making on the environment. Thank you for an exceptional experience!”
“Your company’s commitment to affordable pricing for solar energy systems is truly commendable. We were thrilled to find a provider that not only offered high-quality products but also made solar power accessible to everyone. The installation process was professional and seamless, and we’re already reaping the benefits of reduced energy bills. Thank you for making sustainability affordable for all.”